Mostrar mensagens com a etiqueta Tutorial. Mostrar todas as mensagens

Im tired of the way i look. Im tired of being overweight, a lot of time home, plus a kind of addition for eating candies and emotional eating throw me off of my game. I used to be the kind of girl that walked in a place and guys look at, guys in the street came to me or shout compliments, I want that back, I want to put some heels and, I'm sory the language, but feel bangable and sexy, stupidly sexy.
Dont get me wrong im a girl with curves and always was, but my curves are to round these days so Im staring a diet, I will try to use the school time, yes University is starting again next week, to do some exercise. I feel ridiculous, Im out of breath when im visiting my friend in the 3º floor (yes theres no elevator).

So diet here i come, and how will i diet? here is a DIY ;)

- Pack your lunches, if you make your food, less change you will go eat a burger and fries and a lot of pizza or Dr. pepper or some other non diet liquid;

- Have a note book and instead of using your height use some pants and measure tape, see you progress with those two,

- Drink tones of water, if you dont like to drink it, add a little zip of alcohol, just to give it some flavor, or some fruit juice or just make tea or sparkly water, just dont buy stuff in the store, they have a lot o sugar and other kinds of bad stuff in it;

- Pack snacks, take some cereal bars, fruit, some almonds or nuts (not many because they have a lot of calories), pack sandwich with tomato, cucumber or just lettuce,

- Eat every 3 hours

- Last tip .... buy a bento!

I love bentos because is just super easy to carry they are for me the super man and woman of Tupperwares, Japanese style.

I just bought one, its pink, not my favorite but Im trying to save some money, so i decided not to but the one i wanted that costed a lot.

So here is it! Is really simple today, my first meal, made in 30 minutes i was really in a hurry to get out of the door today, i will try to add recipes and pictures of what im doing with it.

It has rice, carrots, cucumber that i sliced with a peeler, some chicken with soy sauce and seeds and bell peper, some grapes for dessert. Really, really a simple meal.

Dont forget just one treat, im my case the grapes, most of the space must be filled with the vegetables and then a portion of rice or pasta and just a bit of protein (chicken, beef or fish).

Today my DIY is about making your own study material. Im currently studying japanese, its a bit hard because my language is portuguese... so the base has nothing to do with it, but... japan has adopted several portuguese words because we were the first country to go there by boat in 1514. (check this list if you are curious about japanese word with portuguese origins here)

So how to do your own study material for japanese, you can adapt to whatever language you are studying.

1  Study Cards 

Get an hard paper and write on one side the japanese word and in the other the way you pronounce it and the meaning, my big advice here is do not buy the cards, make them yourself, it will be a learning experience by it self. If you want them pretty just buy a lot of paper, cut it the same length and make a hole, use one loop of shower curtains an like that maintain them all together.


2 Dictionary

Make your own dictionary, get a note book or a binder, i really advice you to get a binder, because then you can had paper latter on. And start with a list of all your words starting with A, and then B... and you know the rest. 

3 Work sheet

Start has soon has possible using the words you learnt, reserve a notebook to write sentences with what you have learnt. 

4 Get kids stuff!

Get all the books and dictionaries with pictures for kids you can lay your hands on, they have simplified language and a lot of pictures and sometimes sounds that make learning so much easy !

If you want to know I'm currently studying with this book below, it's great because it came with a cd! So i can hear native speaking and repeat it. 


Being a girl that loves earrings i never used them that much... and why? Because they were always tangled! It was awful to wake up in the morning wish to chose something quickly and get out of the house... so i thought about a cheap and easy way to do my own earring holder.

I got some wood that i was from the local carpenter... he was going to throw it away so it was free!
I went to a cheap store and got a lot of those nails with a loop... and then i just coated all my wood with some watery black paint, so that the wood grain could still be seen afterwards.

To connect all of it i used some regular nails and fishing cord.

And this was the final result!

Cheap because it costs less then 5 euros and it can hold 84 earrings if you put them separated or 168 if you put the pairs together... right now I have it almost complet.. and is so easy to find the right pair ! :)

Hope you like it, kisses !


I found this picture online and remembered i had stored somewhere some diagrams of how to carry and  pack items with pieces of fabric, so this is what i will share today ...


My vacations ... oh well today is my last day of vacation, so my projects and crafts have to slow down because my classes are starting tomorrow.
Two days ago i saw a tutorial on youtube to do a ring box, and today in about... 30 minutes i did my own ( happy, happy happy).
 The cost... was nothing. I already had the box, I try to go and get one, but there wasn't any boxes i liked. So i used one of those boxes that look like a book, the tag was still on so i know it was a 9.90€ box. Then, with an old winter coat a did the rest, use the fabric and the lining, so i dint had to buy any fabric.

To do this my main tip is to measure te fabric, because in the end, if you dont do so, you wont have equal folds for your rings. Enjoy it :D

Tutorial in Youtube


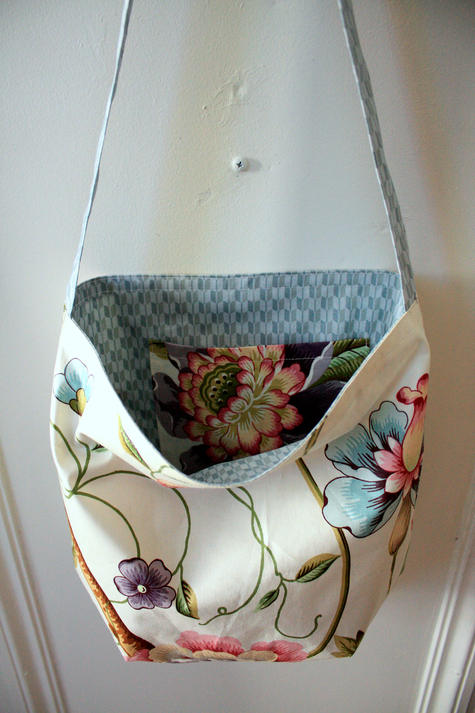
Im trying to do my own tote bag, with some recycled materials that I found laying around the house, i am using a brown skirt and a bed sheet...
Lets see the result soon we hope, because the bag above is just the picture form the site i found :D


Also today i will convert a box into a ring box, i will add the picture, once i finish.

have a nice day...
by the way if you want to try to do the reversible tote bag, acess the link below and try it, ist free at burda website.

Reversible tote bag